About the Sherline Laser Mount
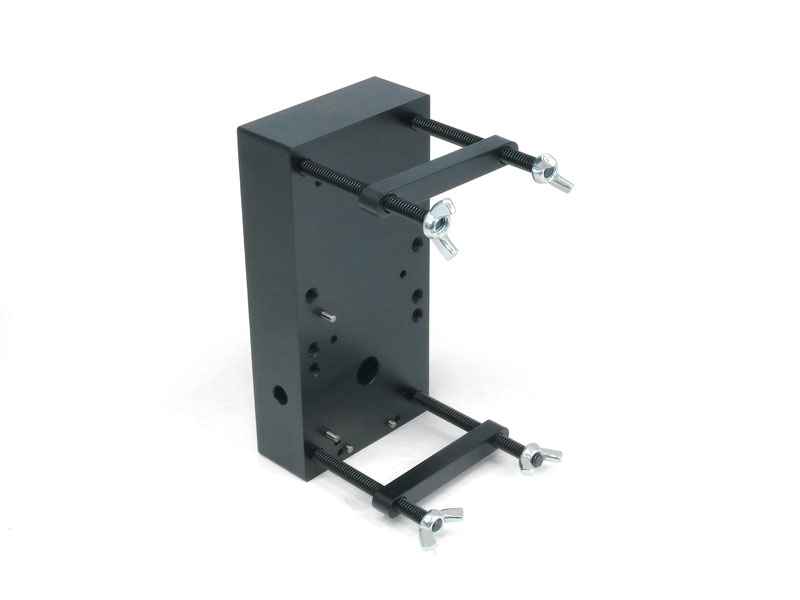
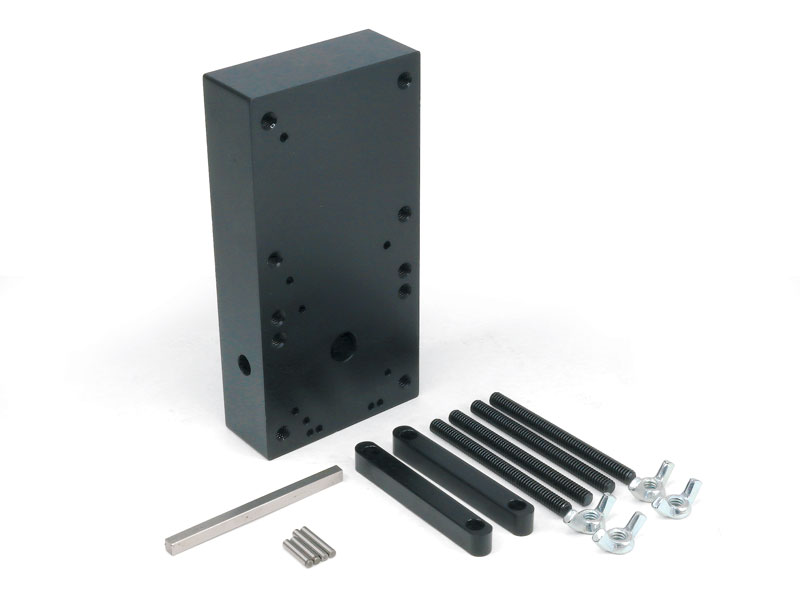
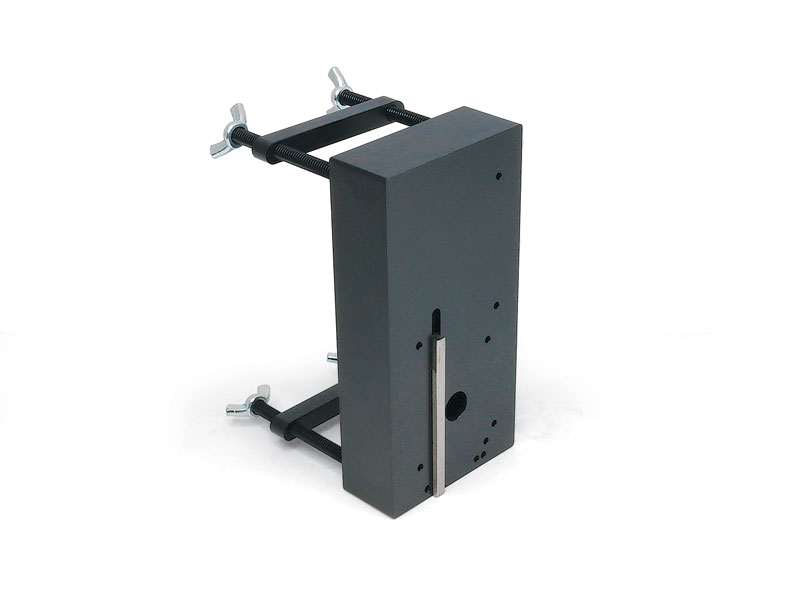
The Sherline laser mount is designed to be installed on the column saddle of Sherline CNC milling machines in place of the headstock, motor, and speed control. The mounting design is the same as the headstock. The laser mount is easily mounted or removed by tightening or loosening the 5/16 set screw located on the side of the laser mount. The same headstock key is used to align the laser mount parallel to the column saddle.
The laser mount is designed to hold several different lasers using locating pins and the two laser mount hold-downs. The laser is pressed against the locating pins. Then, the hold-downs are installed, and wing nuts are used to secure the hold-downs that attach the laser to the mount.
One More Way to Make Your Sherline Mill More Versatile
With the addition of the laser mount to our accessory line, our customers can now use their milling machine for laser engraving. Some of the primary uses for the laser are cutting gasket material for custom gaskets, engraving part numbers on tools and devices, and engraving pictures and logos.
NOTES ON LASERS:
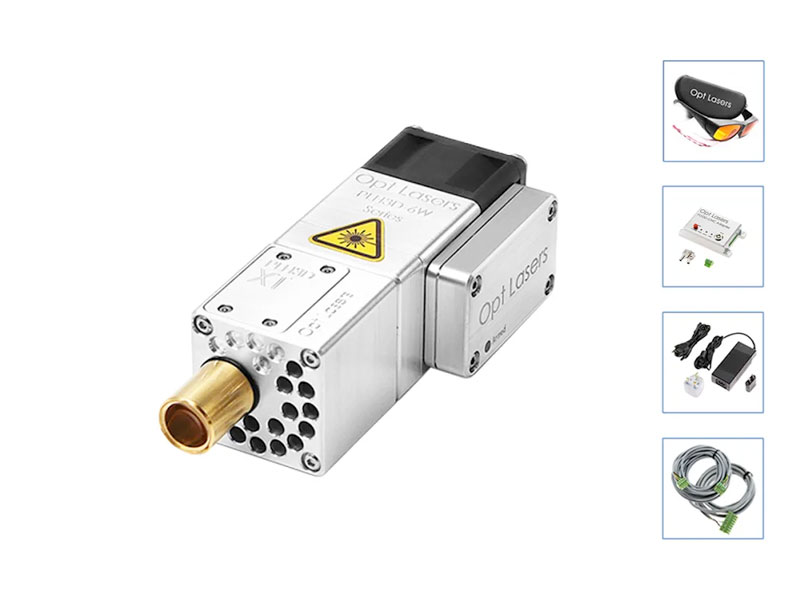
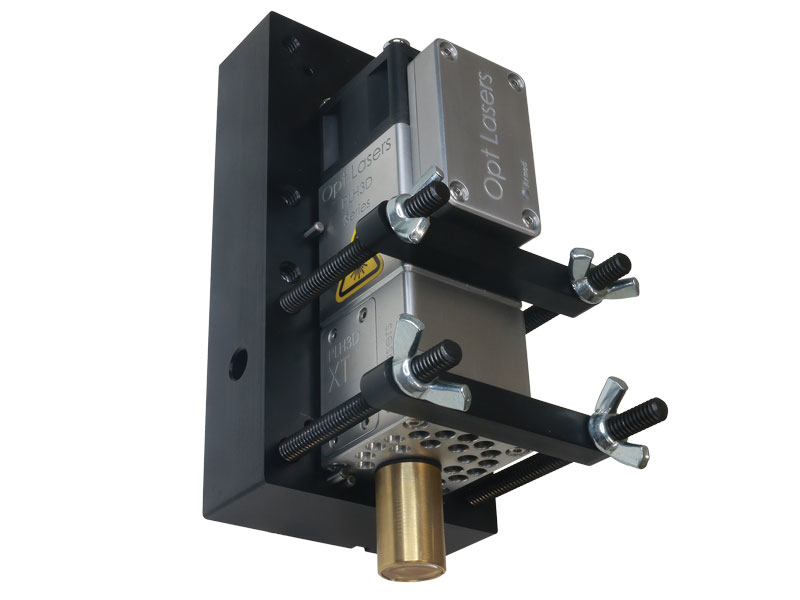
- Sherline Products now offers the Opt Lasers PLHD-XT-50 for purchase. We tested a few different lasers, and we found the Opt Lasers PLH3D to be the best value for the money and to have the best customer service. The Opt Lasers package has everything you need to get started. Other laser manufacturers make lasers that will fit our laser mount.
- All lasers are not the same. Different types of lasers and different wavelengths are used to cut and engrave various materials. Before purchasing a laser, contact the manufacturer and have them confirm that the laser will cut or engrave the materials you will be using. In addition to cutting a specific material, find out what thickness of that particular material the laser is capable of cutting.
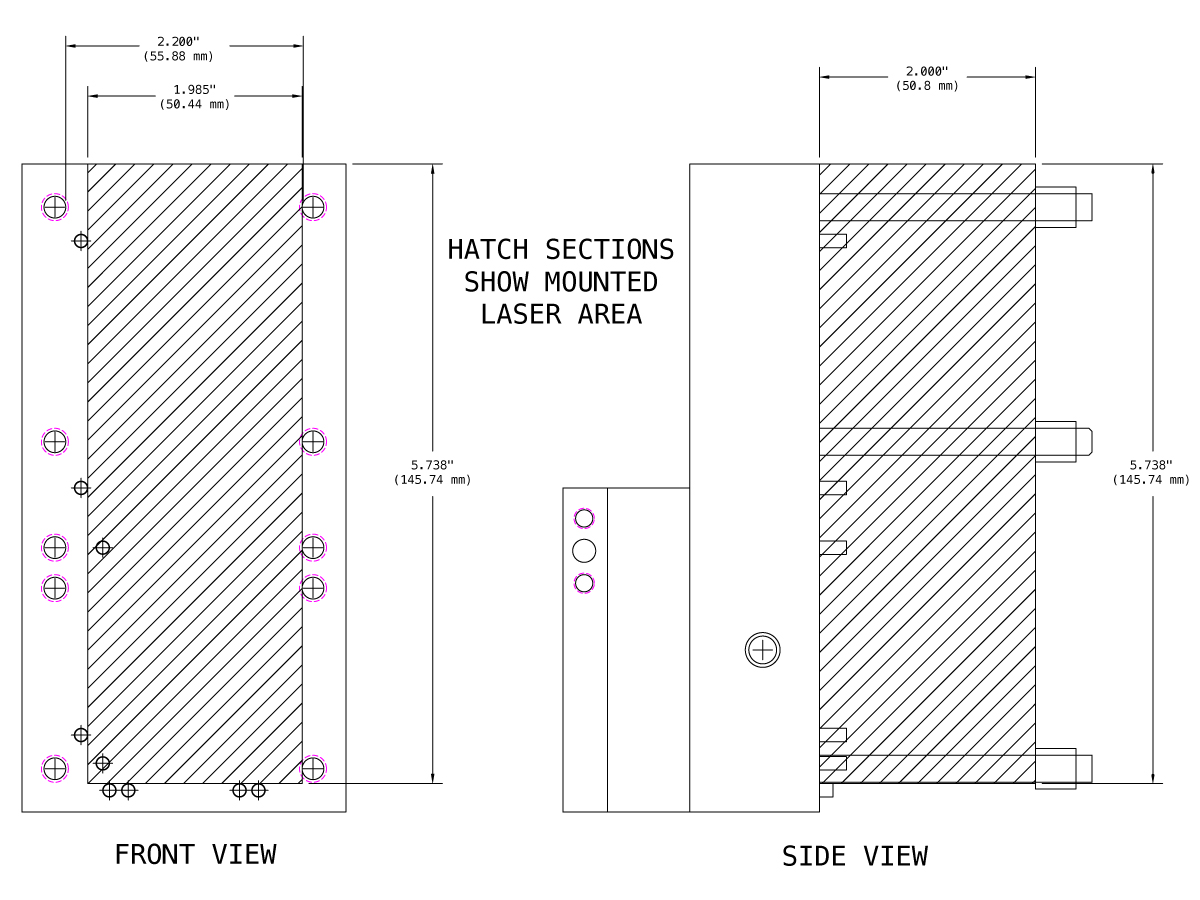
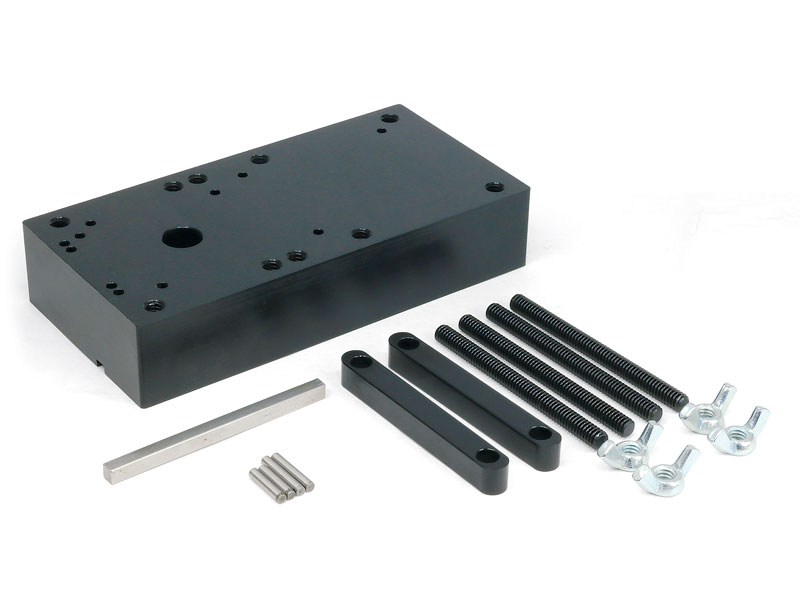
- If you purchase a laser other than the OPT Lasers that we have listed, be sure that it will fit within the mounting area of our laser mount [Width = 2.0” (50 mm), Depth = 2.0” (50 mm), Height = 2.3” – 7.0” (58 mm – 177 mm)]. See Figure 1 below for the laser mounting area. The laser mount can be modified to accept other size lasers if needed. Additional locating pin holes can be drilled and reamed in the laser mount.
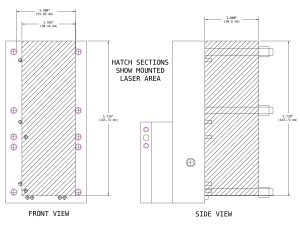
FIGURE 1—Click on the image for a larger view. - Depending on the laser you choose and the size of the parts you will be engraving, you may need to add a headstock riser block (Headstock Riser Block P/N 12950 – Sherline Products) to gain additional space between the laser and the column.
- We tested the OPT Lasers above with the MASSO Touch and Centroid Acorn control. Specific settings and wiring information for these two controllers can be found on the Instructions tab. If you use a CNC controller other than these, you must contact your controller manufacturer and the laser manufacturer for this information.
- ATTENTION ACCU-PRO MILL USERS: The motor and speed-control unit on an Accu-Pro mill is connected directly to the MASSO G3 Touch Controller. In order to use a laser with the Accu-Pro mill, you need to remove the headstock/motor/speed-control unit from the mill. This is not a straightforward operation. In order to remove the existing headstock/motor/speed-control unit, you must add cable connectors that will allow you to remove the headstock from the machine. For detailed modifications, please see the Laser Setup Instructions for Engraving and Cutting on the MASSO Touch Controller.