Product Description
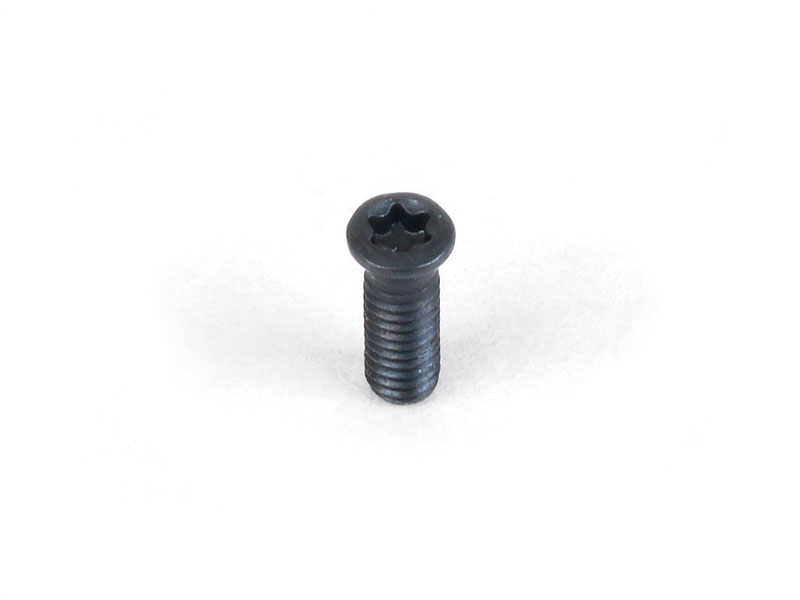
The following information is primarily for our foreign customers who may need to replace or remove this screw from their holders.
Replacement Purchasing Options
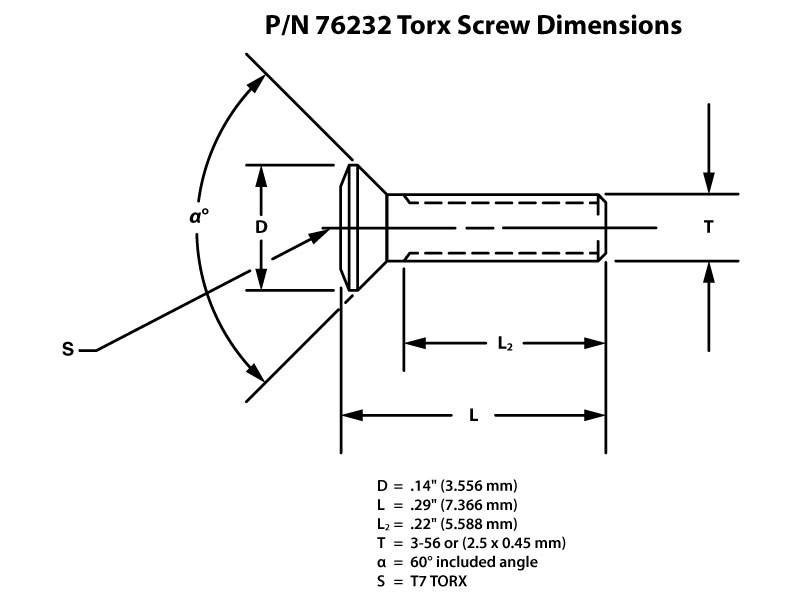
The Torx screw, P/N 76232, is a metric screw. The thread size is 2.5 x 0.45mm. Below are the original manufacturer’s dimensions, Valenite (Walter, a German company, bought Valenite). Walter may still offer these screws as replacement parts. If they do, the Valenite part number was PT-542T, and Walter will have this in their records. You may be able to purchase these from a supplier that is a rep for Walter.
If you have to order these screws from us, they are very small. We sell them as replacement parts, so you shouldn’t have any duty fees.
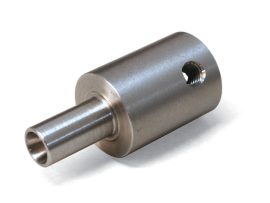
Steps for Drilling out the Original Screw
If the recess in the Torx screw head has become stripped, you may need to drill out the original screw and re-tap the hole for a new screw. The screw hole and the insert pocket are both machined parallel to the bottom surface of the holder.
- First, you will need to drill out the screw head. With the holder in the upright position, located the center of the screw head. It is best to use a #2 center drill to drill out the screw head. If you don’t have a #2 center drill, then a 2.5mm or #39 drill will work. The center drill is better because the drill tip will not walk off the center of the screw head. Regular drills will walk. The purpose of this operation is to drill into the center of the screw head to a depth where the screw head meets the threads. At that depth, the screw head should pop off.
- Flip the holder over and locate the center of the screw hole on the bottom.
- Use a 2.05 mm drill and start drilling the screw out using a low RPM.
- If you are lucky, the drill pressure and CW rotation will cause the screw to thread itself out of the top of the holder.
- If you are not lucky, then you will have already drilled the minor diameter of the thread.
- Now tap it from the bottom up through to the top of the hole, and your threads should be cleaned out and ready for a new screw.